Appointment List
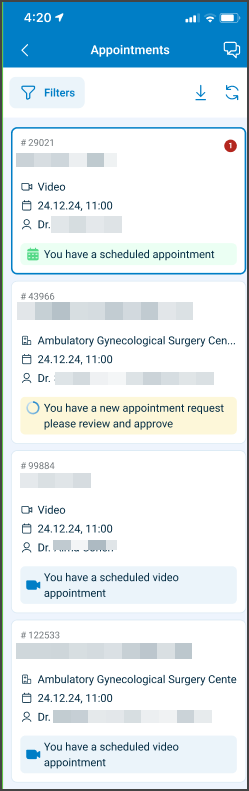
Use the Appointment List screen to view the authenticated patient's appointments.
The screen displays appointment cards with provider, visit, status, and action information returned by the appointment list response.
This screen includes:
| # | Element | Description |
|---|---|---|
| 1 | Header | Displays Appointments title and filter action |
| 2 | Appointment card | Displays appointment status, provider details, visit details, patient name, and available actions |
| 3 | Status banner | Shows the appointment state, such as rating request, scheduled appointment, or offer review |
| 4 | Provider details | Displays doctor image, name, and specialty |
| 5 | Appointment time | Displays appointment date, time, and time zone |
| 6 | Visit type | Displays the appointment location type, such as Clinic |
| 7 | Patient name | Displays the patient assigned to the appointment |
| 8 | Card actions | Displays available actions, such as Rate a doctor and More info |
| 9 | Bottom navigation | Displays Appointments as the active destination |
Workflow
- Open Appointments.
- Review appointment cards.
- Select an appointment card to open Appointment Details.
- Load more appointments when available.
- Apply appointment list updates when appointment data changes.
Validations
| Scenario | App Behavior | SDK Output |
|---|---|---|
| Session missing or expired | Require sign in | state = unauthenticated |
| Appointment list empty | Display empty appointment state | appointments = empty |
| Appointment card has missing optional fields | Omit unavailable values | Field omitted |
| Appointment status unavailable | Hide status indicator | Status omitted |
| Action unavailable for appointment state | Hide or disable action | action = unavailable |
| Load more unavailable | Hide or disable pagination action | pagination = unavailable |
| Request in progress | Show loading state | state = loading |
| Request blocked | Display restriction message | HTTP 405 |
| Request fails | Preserve current list and display error | Error response |
Actions
| Scenario | App Behavior | SDK Output |
|---|---|---|
| Appointment list opened | Load appointment list | PUT /api/v3/appointments |
| Appointment card selected | Open Appointment Details | Navigation event |
| Load more selected | Append previous appointments | PATCH /api/v3/appointments/load-more |
| Appointment list update triggered | Refresh visible appointment cards | PATCH /api/v3/appointments/update |
| Available action selected | Start the returned appointment action | Navigation or action event |
Endpoint Resources
Appointment List
PUT
v3/appointments
Returns the appointment list screen configuration for the authenticated patient.
Get Previous Appointments
PATCH
v3/appointments/load-more
Loads additional previous appointments and appends them to the currently open appointment list.
Update Appointment List
PATCH
/patient/appointments/update
Updates appointment cards that already appear in the appointment list.
The response returns page updates that refresh the referenced cards on the currently open screen.