Level 3 - DOM & CSS Overrides
- Level 3 controls the presentation layer only.
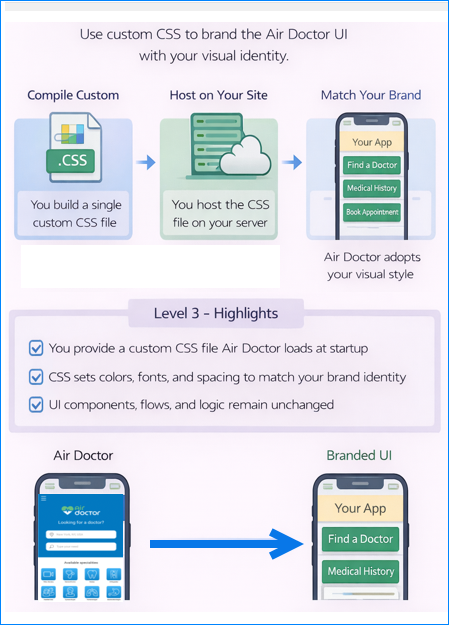
- You supply custom CSS that Air Doctor loads at startup.
- All Air Doctor features, screens, and logic remain unchanged.
- You compile a single CSS file and host it on your site.
- Air Doctor reflects your brand styling without any change to UI components.
Integration Level 3 builds on the basic iframe or WebView integration in Level 2 and can enables partners to override the look and feel of the Air Doctor application. Instead of embedding the site as-is, you supply your own cascading style sheets (CSS) to set colors, fonts, spacing, and other appearance-related values. This level preserves all Air Doctor features, flows, and logic and enables a seamless visual match with your brand.
When to Choose Level 3
Select Level 3 when:
- Brand requirements include specific color palettes, typography, spacing, or button styles that align with a corporate identity.
- Design guidelines demand visual alignment without any rebuild of UI components.
- A cohesive user experience requires Air Doctor screen flows that appear native inside a site or application without functional modification
To increase interoperability, Level 3 applies to both script embedding and iframe or WebView scenarios because CSS overrides apply in either environment.
Step 1 – Brand and visual standards
Brand or design standards require custom colors, typography, spacing, or button styles that align with a corporate identity.
- If this statement matches the integration goals, select Level 3 – CSS Overrides.
- If this statement does not match, continue to Step 2.
Step 2 – Native look and feel
A cohesive experience requires Air Doctor screen flows that appear native inside the host site or application, without any functional modification.
- If this requirement applies and no structural UI change is necessary, select Level 3 – CSS Overrides.
- If structural UI change is necessary, continue to Step 3.
Step 3 – Structural and DOM control
Layout, containers, or component structure require direct control of the DOM and custom components.
- If this statement applies, select Level 4 – Custom DOM.
- If this statement does not apply, select Level 2 – Basic Integration.
Customizing the Styles
The Air Doctor web frontend is open source and its style sheets use the Sass preprocessor. Use the following steps to set your custom appearance:
- Clone our repository - Download the public Git repository that contains the web implementation and the Sass (
.scss) files organized by component and theme. - Modify the Sass variables and shared - The files include variables for colors, fonts, spacing, and component styles. Adjust these values to match your visual identity. Comments in the
.scssfiles explain what each variable controls. - Build your CSS bundle - Follow the instructions in the repository’s
README.mdto compile the Sass files into a single.cssfile, such as. In most cases, you run the provided build script and produce a minified file such asairdoctor-custom.css. - Host your CSS file on your site - Load your compiled CSS before you initialize the Air Doctor application. The CSS scopes to Air Doctor components and do not override your own site’s styling.
Change only Sass variables when you need control of the color scheme, typography, border radii, padding, and margins without any change to business logic.
Use caution with more invasive structural changes. Use Level 4 when you need full control of layout structure.
Initializing the Air Doctor Client
To launch the customized application on a web page, include your CSS file and initialize the Air Doctor frontend module.
The example below imports the module by using the standard ES module format:
<!-- Include your compiled CSS for Air Doctor -->
<link rel="stylesheet" href="/path/to/airdoctor-custom.css" />

<div id="app-root"></div>

<!-- Import and initialise the Air Doctor application -->
<script type="module">
  import { AirDoctorApplication } from 'https://prod.air-dr.com/js/air-doctor-frontend.esm.js';

  // Obtain an authentication token from your system
  const token = obtainTokenFromYourAuthSystem();

  new AirDoctorApplication({
    serverHost: 'https://prod.air-dr.com',
    rootElement: document.getElementById('app-root'),
    landingPage: 'patient/home',
    token: token
  }).start();
</script>
Key Points
- The
AirDoctorApplicationmodule loads directly from the Air Doctor CDN. - The
tokenproperty supplies the user authentication token and removes the need for the Level 2 message-passing handshake when the host externalizes user management. - The
landingPageproperty directs users to any Air Doctor screen within the application.
Building and Embedding Your Styles
The repository’s README.md describes how to install dependencies, compiling the Sass files, and generate the final CSS bundle.
Import airdoctor-custom.css into your site as shown above. For advanced theme control, review the comments in the .scss files. If you need help identifying which style map to specific UI elements, see the Screens Composition (coming soon) section.
Additional Guidance
- Presentation only - Level 3 applies only to appearance (the presentation layer). Do not modify the JavaScript logic or HTML templates. Use Level 4 or higher for functional control.
- Scoped CSS - The CSS scopes to Air Doctor components. Test to confirm that no unintended effects appear in your site.
- Refer to documentation - For details on each UI element and its semantics, review the Screens Composition (coming soon)) section. The Sass files contain useful comments.
Optional: Override Styles via CSS
Purpose
Some partners require small appearance updates and do not need the full Level 3 theme-override workflow.
How it Works
Level 2 provides a custom stylesheet option through the css query parameter. Set this parameter to the URL of a publicly hosted CSS file. The Air Doctor app loads that file and applies its styles on top of the default theme. Use this option to set colors, fonts, spacing, and similar presentation elements while you embed the app through an iframe or WebView.
For example (note the URL-encoded form of the address you provided):
https://www.air-dr.com/webapp/?css=https%3A%2F%2Fexample.com%2Foverride.css
- The CSS must target Air Doctor DOM elements only with accurate selectors.
- Avoid structural changes or any change that affects core functionality.
- Do not modify functional behavior.
This lightweight option suits small branding adjustments. For full theming with Sass variables and component‑level control, use Level 3.
Next Steps
After you confirm that your styling meets your requirements, follow the repository’s deployment instructions to host your CSS and initialize the Air Doctor application on your production environment. Use Level 4 or the SDK and API layers in Levels 5 and 6 for deeper integration or complete replacement.